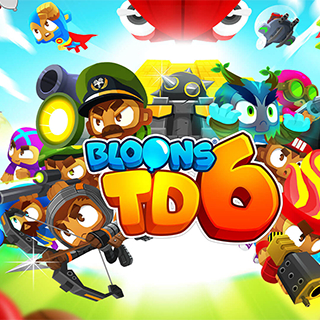
Complete Monkey Towers Analysis - Comprehensive BTD1-6 Tower Guide
Complete analysis of all monkey towers from BTD1 through BTD6. Detailed strengths, weaknesses, upgrade paths, and evolution of every tower across the series.
Introduction: The Evolution of Monkey Towers
Bloons Tower Defense (BTD) is built around various monkey towers that pop bloons. In the original BTD1, there were only 5 towers -- Dart Monkey, Tack Shooter, Bomb Tower, Ice Tower, and Super Monkey. Each successive sequel introduced new towers and upgrade paths, expanding strategic depth dramatically.
What This Analysis Covers
This comprehensive guide analyzes every monkey tower from BTD1 through BTD6, detailing their strengths, weaknesses, upgrade paths, and evolution across versions. Towers are grouped by category:
- Primary Monkeys: Foundational towers available from early game
- Military Monkeys: Specialized units with longer range or unique abilities
- Magic Monkeys: Mystical towers dealing with special bloon properties
- Support Monkeys: Towers focused on boosting others or providing income
Each tower analysis includes notes on when it was introduced and how it changed from BTD1 up to BTD6. Heroes and special agents are excluded, focusing only on standard towers.
Primary Monkeys
Primary Monkeys are foundational towers, often available from the start. They are versatile and cover basic attack types.
Dart Monkey
Iconic starting tower across every BTD game
The Dart Monkey (called Dart Tower in BTD1) is the iconic starting tower in every BTD game. It's a small brown monkey that throws single darts with short range.
Strengths:
- Extremely cheap and great for early rounds
- Can be spammed for broad coverage
- Upgrades to powerful late-game options like Crossbow Master
- Paragon potential (Apex Plasma Master in BTD6)
Weaknesses:
- Base dart limited pierce (only pops 1-2 bloons)
- Cannot pop Leads or Camo without upgrades
- Gets outclassed in later rounds without upgrades
- Short range limits placement options
BTD6 Upgrade Paths:
- Path 1: Juggernaut - Spiked ball shooter excellent vs grouped bloons
- Path 2: Crossbow Master - High damage, long-range precision shooting
- Path 3: Plasma Fan Club - Ability transforms multiple darts into super monkeys
Cross-Game Evolution: The Dart Monkey's core role as a cheap, early-game tower remains constant across all games. However, BTD6's crosspathing and Paragon upgrades allow it to remain relevant even in late-game scenarios.
When to use:
Boomerang Monkey
Curved projectile specialist with multi-bloon pierce
Introduced in BTD2, the Boomerang Monkey tosses curved boomerangs with multi-bloon pierce, excellent for crowd control and positioning optimization.
Key Evolution: From hitting 2 bloons per throw in BTD2 to 4+ in BTD6, with specialized paths for crowd clearing (Glaive Lord), rapid fire (Perma-Charge), and MOAB control (MOAB Domination).
When to use:
Tack Shooter
Radial burst area denial tower since BTD1
Present since BTD1, shoots radial bursts of 8 tacks. Excellent area denial when placed at corners or intersections.
BTD6 Specializations: Inferno Ring (burning area damage), Super Maelstrom (screen-wide blade storm), and Tack Zone (overwhelming projectile volume).
When to use:
Bomb Shooter
Primary explosive tower with area-damage bombs
Primary explosive tower launching area-damage bombs. Naturally pops Lead and Frozen bloons but struggles with Black/Zebra immunity.
MOAB Specialist: Evolution from general explosives to specialized MOAB elimination with Recursive Cluster, MOAB Assassin, and stunning capabilities.
When to use:
Ice Monkey
Freeze support evolved into damage dealer and debuffer
Freezes bloons to immobilize them. Evolved from pure support in early games to damage dealer and debuff specialist in BTD6.
Modern Role: Super Brittle path makes frozen bloons take massive extra damage, while Icicle Impale can slow even BADs.
When to use:
Glue Gunner
Sticky slowdown specialist introduced in BTD4
Introduced in BTD4, sprays sticky glue to slow bloons by 50%. Evolved to handle even MOAB-class bloons in BTD6.
MOAB Control: BTD6's MOAB Glue and Super Glue can significantly slow or immobilize even the largest bloons.
When to use:
Military Monkeys
Military Monkeys tend to have longer range or special targeting, often providing support from land, sea, or air.
Sniper Monkey
Unlimited-range single-target eliminator
First appearing in BTD5, uses unlimited range to attack any bloon on the map. Perfect for single-target elimination and MOAB control.
Specializations: Cripple MOAB (stunning and debuffing), Elite Defender (machine-gun DPS), and Elite Sniper (economy support with team buffs).
When to use:
Monkey Sub
Water-based tower with homing torpedoes
Water-based tower with homing torpedoes. Advanced Intel upgrade grants pseudo-global range by using other towers' vision.
When to use:
Monkey Buccaneer
Pirate ship with dual cannons and hook ability
Pirate ship with dual cannons. Unique hook ability can instantly destroy MOAB-class bloons, while Merchantman provides economy.
When to use:
Monkey Ace
Flying airplane with map-wide coverage
Flying airplane providing map-wide coverage. Spectre and Flying Fortress upgrades offer tremendous sustained DPS.
When to use:
Heli Pilot
Mobile helicopter with pursuit and support capabilities
Mobile helicopter with pursuit capabilities. MOAB Shove and Support Chinook abilities provide unique tactical options.
When to use:
Magic Monkeys
Magic Monkeys encompass mystical and powerful towers dealing with special bloon properties.
Wizard Monkey
Versatile spellcaster with lightning, fire, and summons
Spellcasting monkey with lightning, fire, and summon abilities. One of the most versatile towers for handling various bloon types.
When to use:
Super Monkey
Ultimate high-cost tower with incredible attack speed
Ultimate high-cost tower with incredible attack speed. True Sun God represents the pinnacle of single-tower power.
When to use:
Ninja Monkey
Stealthy shuriken thrower with innate camo detection
Stealthy shuriken thrower with innate camo detection. Sabotage ability provides crucial MOAB speed control.
When to use:
Alchemist
Potion brewer that buffs allies and attacks with acid
New to BTD6, brews potions to buff allies or attack with acid. Berserker Brew dramatically enhances other towers.
When to use:
Druid
Nature-based magic with storms, vines, and economics
Nature-based magic with storm control, vine attacks, and economic generation. Poplust synergy creates powerful druid armies.
When to use:
Support Monkeys
Support towers focus on improving your other towers or providing income, rather than directly popping bloons.
Banana Farm
Income generator essential for funding late-game strategies
Generates extra cash instead of popping bloons. Essential for funding expensive late-game upgrades and strategies.
When to use:
Monkey Village
Multi-purpose support aura with team-wide bonuses
Provides multiple support bonuses: camo detection, attack speed, MIB (allows all attacks to pop all bloons), and Homeland Defense.
When to use:
Spike Factory
Automated road spike traps and ultimate safety net
Creates road spike traps as automated defense. Perma-Spike serves as ultimate safety net at track exit.
When to use:
Engineer Monkey
Sentry builder with Overclock support ability
Builds sentries, traps bloons for money, and provides Overclock/Ultraboost abilities to supercharge other towers.
When to use:
Conclusion: The Evolution of Tower Defense
From Simple to Complex
- BTD1: 5 basic towers with singular roles
- BTD6: 22+ towers with multiple upgrade paths
- Synergy became crucial for success
Strategic Depth
- Crosspathing adds customization
- Paragons represent ultimate evolution
- Team synergy over individual power
The Key Insight
Throughout the series, every monkey tower has evolved significantly. Early games had few towers with singular roles, while BTD6 features complex, multi-upgrade powerhouses. The key insight: no tower is purely the best in all situations -- each has strengths and weaknesses, making combination and placement the keys to victory.